How To Make An Interactive Purchase Display In Rec Room
- Enabling Beta Content: Make sure your room has beta content enabled in the settings to access necessary tools. 🛠️
- Using a Mannequin: Place and configure a mannequin to showcase your character or clothing items inside your room. 👗
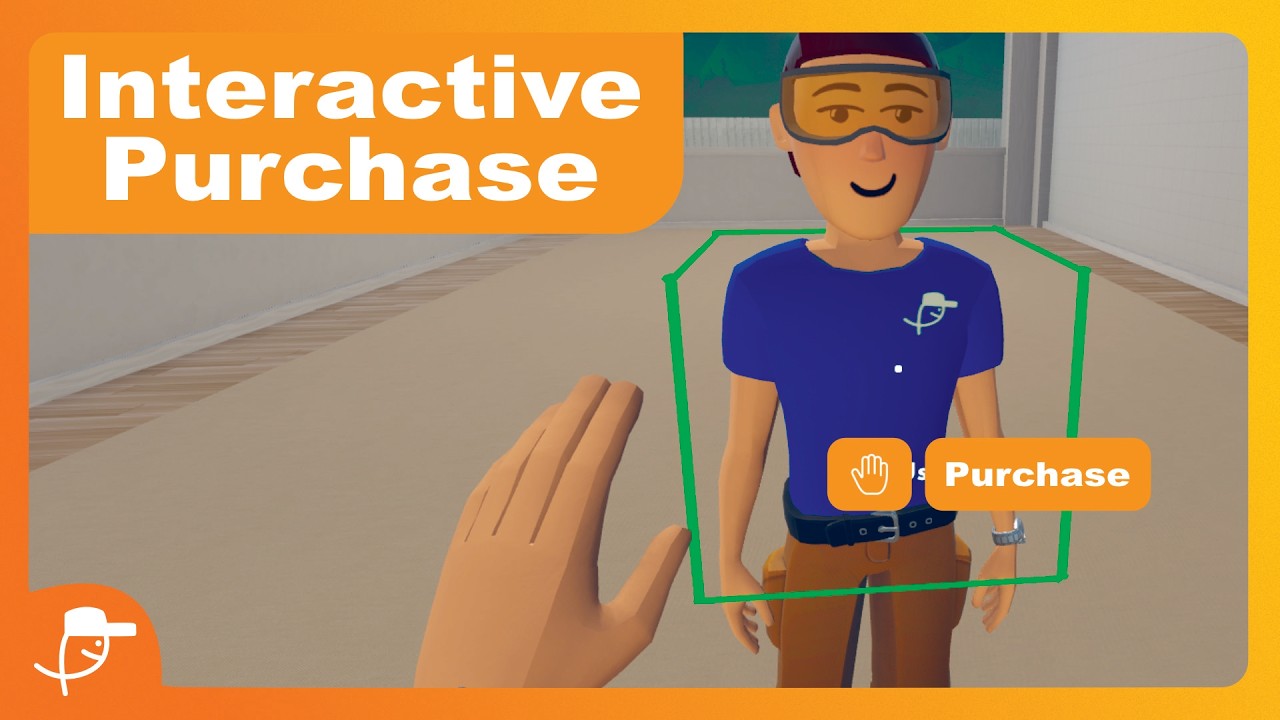
- Creating Interaction Zones: Add an interaction volume around your character or clothing to allow players to click and interact. 🔘
- Setting Up Display Circuits: Use specific chips like avatar item and show avatar item details to create pop-up displays for clothing. ⚙️
- Customizing and Finalizing: Adjust interaction sizes, connect circuits properly, and add sounds if desired to enhance the experience. 🎵
How to Create an Interactive Purchase Display in Rec Room
Welcome to the world of interactive design in Rec Room! If you’re looking to showcase and sell clothing items within your virtual space, you’ve come to the right place. In this guide, we’ll walk you through creating an interactable store pop-up for your Rec Room characters, transforming your room into a lively shopping destination. Let’s get started!
Step 1: Enable Beta Content
Before diving into the setup, ensure that your room is prepped for creativity. Go to your room settings and scroll down to find “Allow Creative Tools Beta Content.” Switch this on to unlock all the tools you’ll need for this project.
Step 2: Setting Up the Mannequin
The centerpiece of your interactive display is the mannequin, a prop that allows you to showcase your character’s avatar. Spawn a golden mannequin in your room, then configure it by opening its menu and selecting “Configure.” Copy your full-body avatar data onto the mannequin for a spot-on display.
Note: If you’re using a bean body avatar, you’ll need to switch to a full-body avatar for this method to work.
Step 3: Making the Display Interactive
To make your avatar interactive, search your menu for “Interaction Volume” and spawn it. Scale this volume to fit around your character’s apparel, ensuring it highlights the area you want to be clickable.
Step 4: Circuit Connections
Move the interaction volume above the circuit palette and start working with circuits:
- Spawn an “Avatar Item” chip just above the interaction volume circuit.
- Add a “Show Avatar Item Details” circuit and connect it to the “Avatar Item” chip.
- Link the “Avatar Item” chip to your avatar item’s constant, like “Under My Cap Blue Shirt.”
- Connect the player interaction input to the player.
Edit the avatar item to specify which clothing to display by searching for your item, like the “Blue Shirt,” and confirm your choice.
Step 5: Adding Sound Effects
Enhance the experience by adding audio. Connect a sound chip at the end of the avatar item detail circuit to play a sound when the display is interacted with.
Final Touches
Your interactive display is now ready! When you or other players click the interaction volume, your selected clothing item will appear, delivering a fully functional store pop-up.
If this tutorial was helpful, consider supporting by leaving a like and subscribing for more creative insights. Stay tuned and keep being creative in Rec Room. See you in the next tutorial!
Hey everybody, it’s Under My Cap, and welcome back to another video. Today, I’m going to show you how to make an interactable store pop-up for your virtual Rec Room characters, so you can display your clothing items inside a room and sell them to others. As you can see here, I have all these awesome little characters. If I click on one of them, a small store pops up for each item. Looking at the circuits over here, they might seem a bit complicated, but trust me, it’s super simple. There are multiple circuits you can use. First, make sure your room has Beta Content enabled. Go to your room settings, scroll all the way down, and ensure that “Allow Creative Tools Beta Content” is turned on. If it isn’t, you’ll need to switch that on. Next, you’ll need to use a prop called a mannequin. The mannequin allows you to display your character inside the room. It looks like this little golden figure. Place one in your room, then configure it by opening its menu, selecting “Configure,” and copying your full-body avatar data onto it. If I click to copy, my full-body avatar is now cloned onto the mannequin. Note: If you’re a bean body, this method won’t work for you; you need to switch to a full-body avatar. Now, we want to make our character interactive so players can click on it and see the clothing pop-up. To do this, open your menu and search for “Interaction Volume.” Spawn that in, then scale it to fit around the shirt or the area you want to be interactive. Next, move this interaction volume above the circuit in the pallet. You’ll need a few chips: first, spawn an “Avatar Item” chip just above the interaction volume circuit. You’ll also need a “Show Avatar Item Details” circuit, so make sure to spawn that as well. Connect both circuits together, and also connect the “Avatar Item” circuit to your avatar item constant (for example, “Under My Cap Blue Shirt”). Finally, connect the player who interacts to the player input. Once all circuits are connected properly, you’ll want to edit the avatar item to specify which clothing item to display. For example, search “Under My Cap” and select your specific item like the blue shirt. Confirm your selection. Now, when you or others click the interaction volume, it will display your chosen clothing item, creating an interactive store pop-up. Remember to make sure the interaction volume is slightly larger than the mannequin to allow easy selection. You can also add sound effects by connecting a sound chip to the end of the avatar item detail circuit. That’s it! You now have a functioning interactive display for your clothing items. When you click on the character, the clothing pops up. If you found this tutorial helpful, please leave a like and subscribe. I can’t wait to see you in the next video. Stay creative, everyone!
Video Thumbnail

This post has been automatically generated using services to reformat and enhance content based on the video’s transcripts. Some information may be incorrect and may not reflect undermycap’s values or views.


